Making a Felted Dragon! September 17, 2015 11:13 7 Comments
Some of our most frequently asked questions are about felted dragons. “How long did that dragon take to make?” “Did you use a pattern?” “Do you have a dragon kit?” “Are you going to have a dragon kit?” Since the answers to these questions are always the same: a long time, no, no, and probably not – I documented the last dragon I made in photos so, for those of you that are feeling ambitious and brave and want to try making one of your own you can see the steps I used to make one.
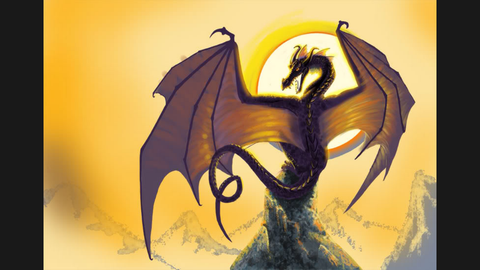
There are a lot of steps and pieces to making up a dragon. I usually decide on a color or range of colors I want to work with. (One dragon I made was completely designed around this vintage pair of buttons that I wanted to use for eyes.) The next thing I think about it size – how big do I want the dragon, and where might I want to display it. We often create dragons as part of our gnome environment. This dragon was designed to sit perched on top of our display tree. I wanted him to be lurking over the gnomes in a threatening way. I also wanted to make a completely different face style then I had ever made before. If you felt a lot you start to make things that all look alike. It can be difficult to breakout of the comfort zone a branch out. This had happened to me with my dragons, so I was determined to think outside the box for this one.
After I’ve decided what color my dragon is going to be, and how I want to display him (or where) I start look at “dragons” on Google images for inspiration pictures. I’m looking for interesting head shapes, leg positions, and body positions. Here are some of the images I used for this dragon:


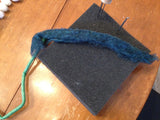
Once I have a general concept, I begin with a foam coated wire the length of the dragon from snout to tail. This guy is about 3.5’ long. I start covering that with an un-dyed batting (no reason to have the more expensive dyed wool all the way through) I wrap the wool around the wire and felt as I go. This process is a little tedious. You can’t really work fast because if the needles hit the wire they break. This is one of the reasons we avoid working with armature as much as possible! I continue this wrap and felt process until I have a snake that’s about 2” in diameter. I knew I wanted this guy’s tail to wrap around the tree display that he would be perched on, so I felted this curvature into his tail right from the beginning.

Beginning the wrapping and felting process.....

In this picture you can see that I am starting to add bulk around the belly area. You can also see the colors I am planning to use there on the table.


One thing that I did on this dragon that I had never done before was to make the head as a completely separate piece. Jen and I do so much felting that we have to really watch out for physical stress and strain from it. When you are trying to sculpt and so fine detail (like eyes) It is cumbersome to be holding and turning the entire piece.
Once the body is felted and some shape has been set in, I start working on legs. Legs are a LOT of work! Feet, joints, toenails, and firmly felted enough to make the dragon stand! And there are 4 of them! Here are some pictures of the legs and feet in the works:


1. basic form 2. attaching the pieces 3. covering with color

4. Adding depth of color and talons! Don't forget there are 4 of these!
Once I finished the legs I had to attach them to the body. This is tricky and needs time and attention – for one thing you need a very strong attachment. You also want to make sure your dragon can stand firmly and be in the position you want. Lots to think about and lots of poking! I wanted to avoid this stage so I went ahead and made lots of spikes for decorating him later on.

Spikes, spikes, and more spike!!!!

When you can't avoid it any longer, go ahead and tackle that leg attachment!
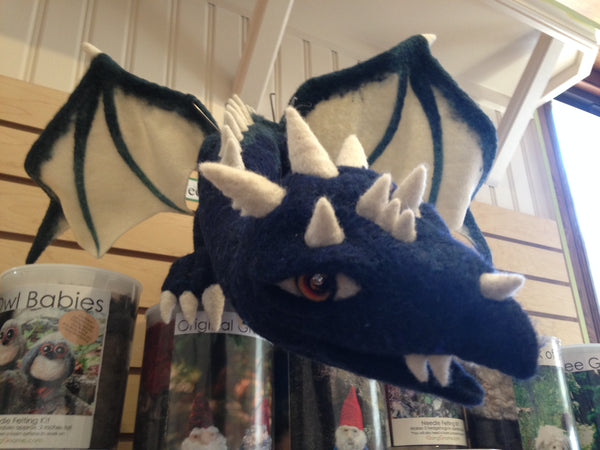
Once the legs were attached it was on the fun part – the head! Once again I started with natural batting and planned to cover with color after I had the shape and size established. I put a foam cone in the neck and of the head to keep a hole that the neck could fit into when I was ready to put it all together. Dragon heads and faces are an amazing opportunity for getting creative and daring! As I said I wanted this head to look really different from past dragons. Keeping in mind I was going for fierce, and my dragons often turn out looking cute, I decided to make a pointed face and give him gold sharp looking eyes.


In these pictures you can also see the top and bottom eyelids that get attached around the eyes


One thing that often happens with dragons is that they take on their own look along the way. I often make parts that I don’t end up using later on because they just don’t suit the overall character. This neck piece I made looked great until I added the wings and then it just didn’t make sense. So….I ripped it off and voila he looked much better! Like I said they take on a life of their own.

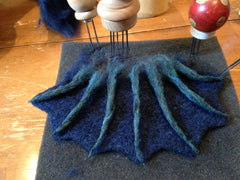
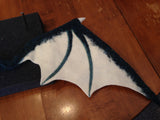
One of the most difficult parts of any dragon is the wings. You want them to be strong and durable, but also fine and ethereal. Ethereal can be very difficult to achieve in needle felting. I use wire across the top of the wings, I also build them as one piece. This helps them be able to be built strongly into the body. I used regular sheet felt for this set and felted batting into the felt for decoration. Going with white for the wings was a total wild card - I did it because that's what I had and I didn't want to go to the fabric store ;) I actually love the way they turned out!
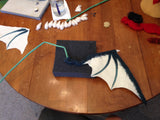
Once the wings were felted – I used one long wire across the top of both wings leaving a gap in the middle for attaching the wings to the body. With this dragon, once I had the wings built I realized the front legs weren’t quite right and needed to be added too before the wings could be attached – you can see there are lots of changes and modifications that go into making a dragon, as they influence their own creation. I finally got the wings on and 30 spikes on his head and back and voila! Finally finished! I love how he turned out, and am looking forward to seeing him lording over our gnome display at our shows this season. Hope this helps and inspires you to start your own dragon…….


Comments
Laura on January 10, 2022 11:43
What is a reverse felting needle?
Rachel Prince on December 21, 2018 06:54
Hi I was wondering where you got the spikes for your amazing dragon? a great show stopper
Rachel
nancy on June 11, 2017 20:17
Wow! This is amazing!
Sandra Roberts on April 15, 2017 17:56
WICKED!!! As a long time needle felter of human type creatures I was looking for a dragon kit (In a much smaller format then yours) But I think if I have to attempt it without a good instructional kit I may just try it in a larger format! Your Dragon is so impressive. While having done full child size elf (3’6") I want a creature to befriend him ( about 2’ high would be suffecient I just have one question is there an Armature through out?
Rebecca Mondorff on March 9, 2017 21:31
Thank you for sharing the story of how you constructed your Dragon. You are very talented and the results of your work speak volumes! Excellent project. Well done!
Pam Lembo on November 6, 2016 12:13
Absolutely wonderful. Please do more!
I saw you at the Big E show and we were discussing the Fox, the red one sitting up similar to the white one you had at this show. You had a red one at the Rhinebeck show. I asked if you had any reverse felting needles and you said no and had no source…..you do now…..Living Felt in Texas carries them. I think they will be great for animals. I am going to order some. If you want I will let you know how they work.
I love your site, your kits and your work…….but I DO miss the shop!
Best regards, Pam
angela on April 12, 2016 23:44
great work love it.